Crafted by Nature is a new class, at the Media Lab, taught by our new prof. Neri Oxman. The mission of the class is no less than “We will invent novel fabrication methods inspired by nature and reconsider the way things are designed and made in the 21st century.”
After explaining how the class will move through the semester, Neri asked us to find and pick a specimen (a system that you can find in nature) that we find enchanting and observe its behavior to external stimuli. One of her examples was a pine cone – the helical geometry of the cone allows the pine cone to withstand compression, by shifting its seeds (the cone uses this process to distribute the seeds in spring). This seems easier than you would think. Beauty often roots itself in simplicity, but in nature, nothing is simple if you look closely enough. I think everyone tried to find a beautiful, yet functionally interesting specimen (it’s interesting that in the human psyche functionality and beauty are not independent of each other. In fact, the function relating these two is one of the most sought-after relationships there is).
My specimen was a sponge. 4 months later, looking back, I have to say it’s way more complicated than I have thought. I teamed up with Marshall Prado and Cara Liberatore, two awesome students from the Harvard Graduate School of Design to base a project that learns something from sea sponges. To get a deeper understanding of internal structure of sponges and since we are at the very center of the the dorkosphere, we CT scanned a sea sponge (Thanks Kenny!):
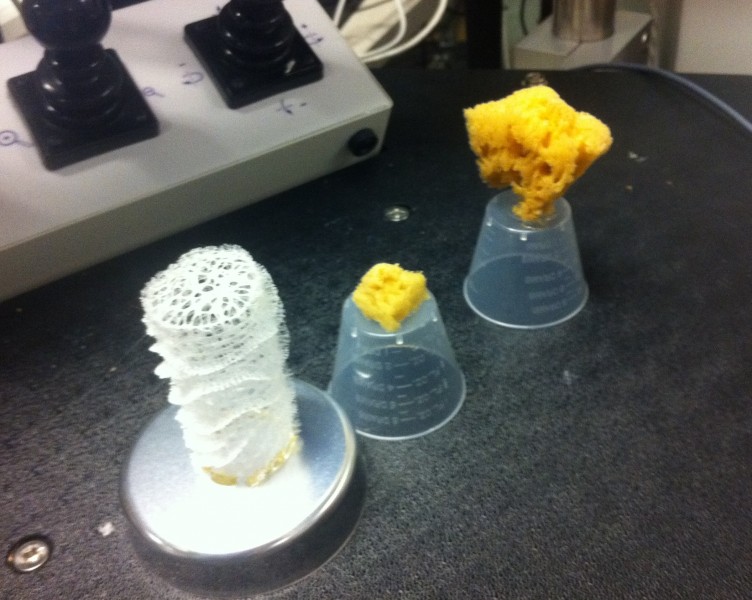
We started off by doing very low level material tests. This phase was solely exploratory, without clear directions. From the start we were trying to replicate the intricate structure of sponges – the interconnected chamber system of void. Our process was mostly molding silicone or urethane onto other materials. An overview of our processes throughout the semester can be seen below.
After playing with materials and processes for a month or so (see pics above and shoot me an email if you want to know more) we concluded that there are two ways to replicate the sponge structure: the negative or the positive approach. The positive approach was to create the chambers individually as hollow enclosed spaces and than to connect them with another material (glue them together). The negative approach was exactly the opposite philosophy (wow, aren’t we clever) – after constructing the void system from any (even flexible) material, we casted material to the remaining space and voila, we got a sponge. We explored both directions and ended up creating our final sponge using the latter method.
For the positive approach we needed a machine that constructs arbitrary hollow shapes for us. So I built a roto-molder aka. spin-caster. It looks like this:
So what’s going on here? This is an under-actuated robot controlled by a manual drill. There are two frames inside that spin anything tied to the center frame in all directions. OK sounds fancy but why? Centripetal force is the answer – by rotating a two-piece mold constantly around this machine can make hollow casts. So if I mill out a sphere from foam and put a tiny bit of silicone into the mold and spin it using the spin caster until the demold time it will look like this.
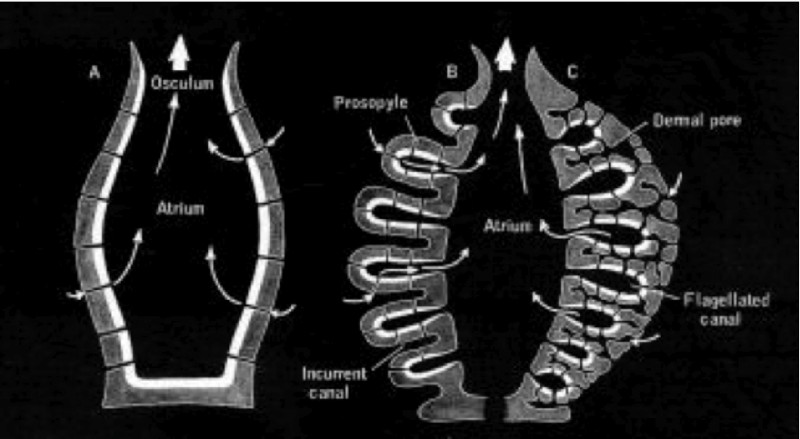
Back to sea sponges. Their cell structure consists of general purpose cells, but the orientation of these cells change in response to underwater currents. You can think about this phenomenon the same way Sunflowers turn their heads to maximize the amount of sunshine hitting, similarly, Sea sponges change their structure so they absorb the most nutrients from the sea.
We used a similar analogy when designing our system: we envisioned a chair that used a cell structure to translate mechanical stress (someone sitting on a chair) to a sphere packing (that we fabricated).
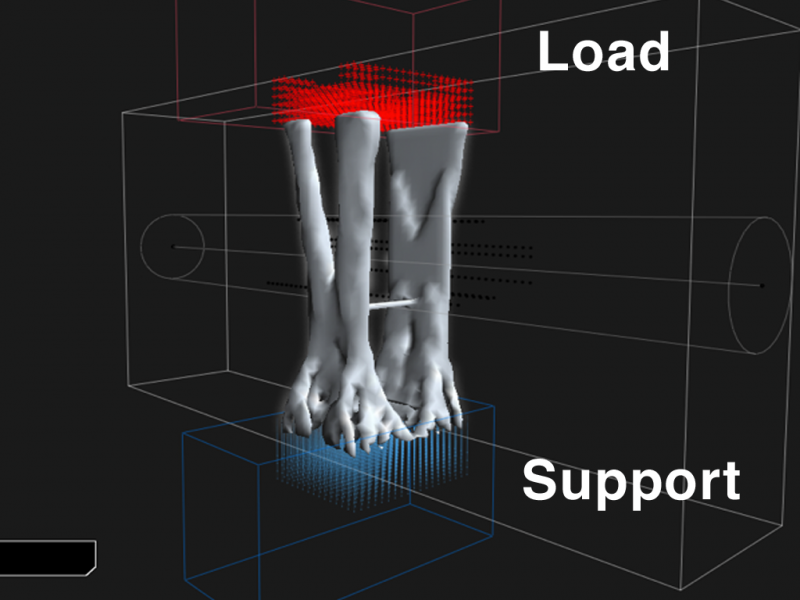
We used Topostruct coded by Panagiotis Michalatos from the GSD to create a virtual stress pattern. Topostruct allows you to define points of support (where the chair’s legs touch the ground) and loads (where you sit) and calculates the stress patterns that emerge from such a system. The growth pattern looks like this:
And the stress lines that it yields look like this:
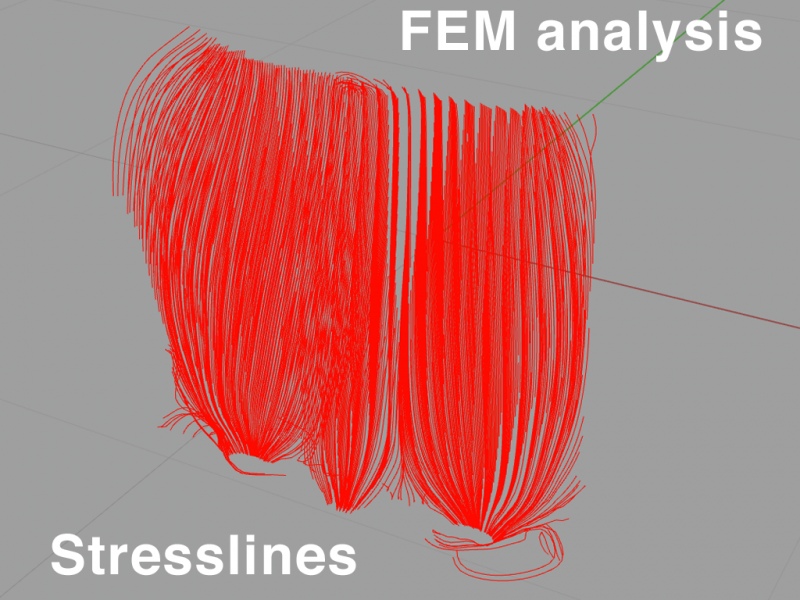
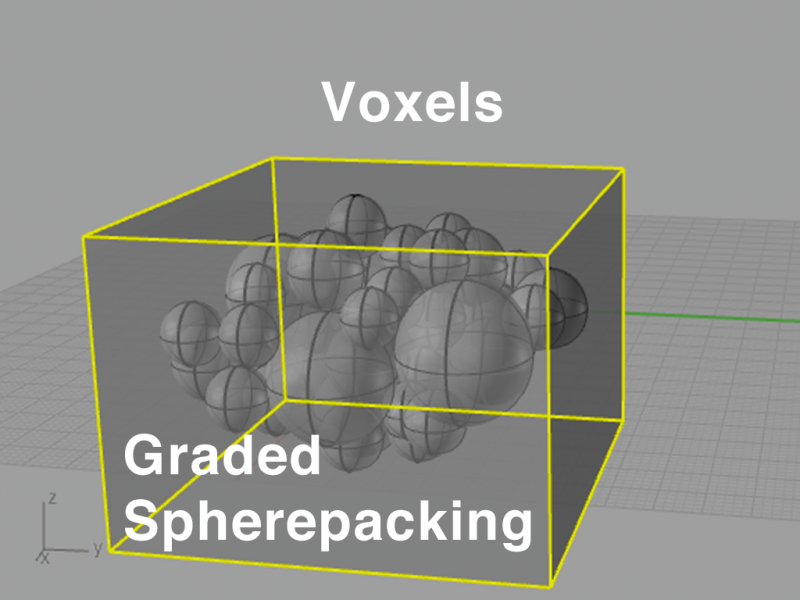
From the stress lines, we created a sphere packing that relies on a simple rule: regions, where smaller spheres are present, will give structure to the system (needed near contact point with the ground), while large sphere packing results in flexible parts (the seat was made this way).
I wrote a script in Python (actually RhinoPhython that executes in Rhino 3D and is free for Mac). It voxelizes the space uniformly and depending on density of the stress lines in a given voxel it packs variable sized spheres into the voxel. The range of radii of spheres is a function of the density. A voxel may look like this:
We modeled a whole chair like this and we found it interesting since we actually did not design the chair at all. The person who’s pressure system we used (let’s call it “ass print”) designed the chair for him/herself. Pretty neat.
Next step was fabrication. How do we make a sphere packing in real life? Baloons! OK, but how are they going to stay in place? Inspiration:
What we needed was something similar, but less fancy and much bigger. So we hacked a huge trashcan to become a gigantic vacuum chamber, like this:
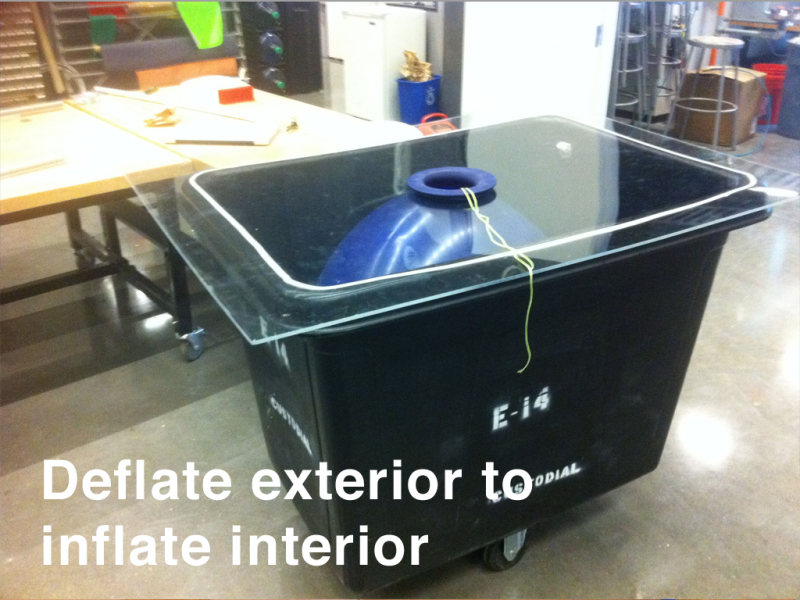
What you see here is a trashcan with a small hole drilled on its side, where we suck the air out with a pump. The top is sealed with some insulating tape and a huge sheet of plexi with a hole on its center. Into that hole we stretch a huge (7 feet large !!) balloon. Thus when we depressurize the chamber the huge balloon magically inflates, but with its “mouth” open so we can stuff our little balloons in![]()
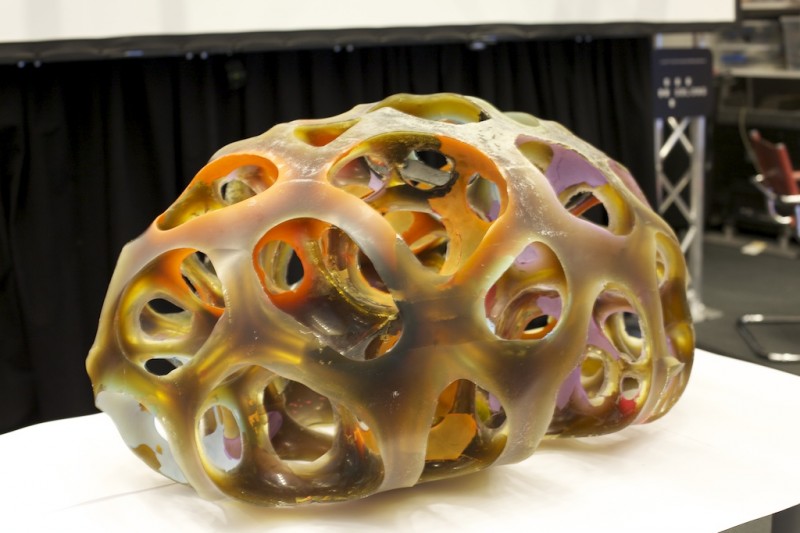
From here it’s relatively straight forward: we recreate the sphere packing that we computationally modeled into the huge balloon. After that we start pouring the mixed casting material into this balloon packed system. We used a Smooth-on product called Task-14 which is a semi-rigid plastic.
And this is how it looks at the end: